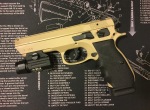
Shooting low and left is apparently a common tendency among new handgun shooters. I had no idea. Until I started shooting pistols. In fact, I was ready to get rid of my first handgun, a Smith & Wesson SD9VE, because I simply couldn’t keep my rounds centered. The gun has a somewhat bad reputation anyways and a fairly terrible trigger. It’s gotta be the gun. It wasn’t. It was me. Keeping that gun and learning how to consistently shoot center target may have been the best lesson I forced myself to learn. Now it’s one of my favorite guns to shoot. Not the lemon that people make it out to be. It does have a tough trigger though and that’s ultimately what turns people off about it. It’s going to accentuate bad habits. The target below provides an excellent example. Initial rounds are center impact with successive rounds trending low and left.

Shots tending low & left as I go. Point of aim (POA) remains the same at dead center.
Clearly the gun is capable of hitting center target, the initial rounds demonstrate that. As I continue to shoot, the low and left pattern quickly emerges. I have seen this pattern repeat itself more times than I care to admit.
So what exactly is going on here and what is it about the SD9VE’s trigger that is contributing to me shooting low and left? For starters the trigger has a tremendous amount of take up and then requires about 8lbs to finally break. What does that mean for the shooter? A lot of time and significant pressure on the trigger before the gun fires. A lot of time on the trigger means more time to make errors. Needing more pressure to break the trigger to fire a round means more opportunity for that pressure to influence the gun’s barrel off target. There are lots of factors that influence how well we shoot. These include: stance, grip, sight alignment, breath control, trigger control and follow through. The three factors we are going to examine in this article are grip, trigger control and follow through.
Lets start with the grip. The grip I learned to shoot with is commonly referred to as the thumbs forward grip.

Thumbs forward grip.
This grip allows the dominant hand to grasp the firearm as high as possible under the slide while the off hand fills the gap that the dominant hand leaves open. This grip provides several advantages.

Gap left over from the dominant hand.
Because of the height of the grip under the slide the recoil impulse of the gun tends straight back into the strong support provided by the bony structure of the dominant arm. This ultimately means less potential muzzle rise. Because the firearm will tend to recoil most in the direction of least mass it is imperative to support the firearm at the gap left over by the dominant hand. The thumbs forward grip also allows the shooter to provide relatively equal pressure on the firearm with each hand as well as provide a complementary pressure of pushing with the dominant hand and pulling with the off hand. In all, a very stable and harmonious grip that allows maximum control of your firearm while also mitigating recoil impulses from all directions. Why so important? Because its the first step in pointing the gun effectively and efficiently in the direction you want to shoot.
Now for trigger control. Trigger discipline is probably one of the most difficult things for a novice shooter to work on but arguably the most important. It’s not particularly difficult to recreate the proper stance or even grip. It can be however very difficult to manage the fine motor skills involved in properly squeezing the trigger, especially on successive shots while managing recoil. First the trigger finger. The trigger should be in contact with the pad of the finger between the tip of the finger and the first joint.

GOOD!
Easier said than done I assure you. It takes practice to maintain this precise contact. The tendency will be for the finger to drift further over the trigger until the first joint is the point of contact.

BAD!
This tendency is even more pronounced when the trigger finger is lifted off the trigger between shots. When pulling the trigger, focus on constant even pressure, straight back. This is important. Any pressure on the trigger that is not straight back can potentially cause the barrel of the gun to shift left or right. After depressing the trigger in this fashion: slow, deliberate and straight back, hold the trigger depressed and continue to focus on your front sight making sure it is still on target. Then you can slowly release the trigger until it resets. This is called follow through and can be an equally important factor in accurate shooting . By “following through” we attempt to minimize movement of the barrel during the short time the bullet is traveling out of it. Following through also allows us to be in place and ready to make subsequent shots. One school of thought is that a shot has not been completed until recoil has been managed and your firearm is back on target, trigger is reset, and you are ready to fire again.
So how do we practice these various skills? At the range preferably. Most of us though don’t have enough time to put the number of live rounds down range to perfect these skills. The answer is dry firing. First and most importantly: check that your firearm is clear and safe. Second, check it again. When you have checked and double checked that your firearm is safe find a nice quiet place to practice. There is a saying that is particularly suited to dry fire practice: practice doesn’t make perfect, perfect practice makes perfect.
- Place a target on the wall.
- Get in your preferred stance.
- Place your front sight on your target in proper alignment with your rear sight.
- Breath…
- Check your grip for excessive pressure or limpness.
- Begin a slow deliberate trigger pull until the trigger breaks insuring proper contact of the trigger finger.
- Hold the trigger back as you maintain focus of your front sight on your target.
- Slowly release your trigger just until reset.
- Repeat…another 999 times.
It’s not glamorous and not even particularly fun.  But it does work. By mastering control of your firearm in this controlled setting you will find a much greater level of success when you head to the range. When you do head to the range and are now dealing with recoil, noise and distraction, just remind yourself of these fundamentals. Take each step in turn and be patient. So what exactly was causing me to shoot low and left? Some say trigger slapping or poor trigger discipline. Others say too tight of a grip and others anticipation. Which was it for me? Not sure really. But if you follow and practice your fundamentals, things just fall into place. Before you know it low and left will be a problem long left behind. I am happy to report that my targets look more like the target here to the right. I am still by no means a crack shot. Doubt I ever will be. But with practice I know I can be an effective pistol shooter and my enjoyment will only increase as my skill does.
JD
Categories: Day at the Range